Sunday, 17 September 2017

INKspired Sketch Blog Hop 64 -


Welcome to our blog hop this sunday night. What a weekend we have had snow,sleet and sago (small hail) all day saturday and barely got to 5 degrees C and today it has been a beautiful sunny day topping 18 degrees C.
You may have hopped across from Allison and I can't wait to see what she has made to share with us all.

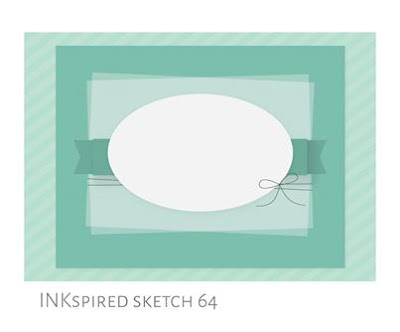
Teneale has given us the following sketch for tonight which did confuse me at first as to how many layers it was.

Well started with crumbcake and sponged the edge. Then added a layer of Berry Burst (love these new In Colors)- sponged again - my friend Vicki will love that!
Kept cutting the Powder Pink down until I was happy with the size. Added some adhesive to stick them together and put them through the Softly Falling embossing folder.
 Sponged around the edges of the Powder Pink with Berry Burst. Tied the linen thread in a bow and the adhered to the Berry Burst. Attached the ribbon to the card.

 Love the words from the Layering Love so added to the oval with Archival Basic Black ink and stamped some flowers from
the Happy Birthday Gorgeous stampset. More  sponging around the oval using Berry Burst ink.
Here below are the two stampsets that I used for this card.


Thanks for stopping by and now it is onto the 
lovely Barb and I can't wait to see what she has made.


Have a great time stampin'
until next time

Maree

List Of Products:

Stamps and Dies:  Happy Birthday Gorgeous stampset, Layering Love stampset 

Cardstock & DSP:   Crumbcake cardstock, Berry Burst cardstock,  Powder Pink cardstock,Whisper White cardstock

Ink:   Archival Basic Black ink, Berry Burst ink, Crumbcake ink

Other odds and ends required:  Stampin' Trimmer, Clear Blocks, Snail Adhesive,Softly Falling Embossing folder, Stampin' Sponges, Layering Ovals Framelits Dies, Linen Thread, Berry Burst Finely Woven ribbon

Sunday, 3 September 2017

ESAD 2017 Holiday Catalogue Blog Hop -


Thank you for joining us on this ESAD hop of the new
Holiday Cattie - we are all so excited.
New products -WOW!
You may have started with me or you may have hopped across from the delightful Cheryl Algie
I love the kits that Stampin' Up! give us to use. I had to use the new Watercolor Christmas Project Kit and the Watercolor Christmas stampset that goes with it. Such beautiful bold words for the card fronts! 
 You make up five of each of these four cards with the kit.
It was so easy to make these cards up. I changed
the cards up as you can see below. Added some real red behind the trees and added it to the emerald envy striped card. I stamped the words on the second card straight into the wreath circle and glued some of the gold mini sequins around and inside the wreath.

You could change these cards and use your own cardstock to make more cards from the kit than the twenty.


Tips for making the Cards
1. Stamp all the sayings at once.
2. Make sure your Archival Basic Black is well inked.
3. I added a dab from the Fine-tip glue pen to the end of the gold mini sequin trim (stops the sequins from falling off).
4. When handling the mini sequins use a pair of tweezers - makes picking them up and putting them in place so much easier.


Now it is onto Kristel Rimmer  and I can't wait to see what she has made.
If you get lost there is a list at the end of each blog so that you can see where to go. We would love you to leave a comment.


Thank you for stopping by on this wonderful
ESAD Blog Hop.
until next time
 happy stamping.

Blog Hop Participant List
25. Liv Ingle